A few weeks ago I finally tried my hand at making croissants, and oh boy! These were the best tasting croissants I have ever eaten – except for the ones I ate at a little dingy hotel in Paris in my youth. I’m sure that lovely lady had been making croissants for her hotel guests for years, so I think I’m excused. Despite the fact that I saw how much butter I put into those little croissants, I still ate too many. There are just some days when I don’t count calories.
I just can’t resist the flaky layers of croissants. They are so buttery and soft. You can pull them apart, and dab some jam between those layers. Or you can be like my children, who love to pull the middles out and eat them plain. My other favorite is to slice them in half and pour some honey inside.
Croissants taste the best when they are eaten on the same day they are baked. They are still OK twenty-four hours later – but they were more like what you find at the stores. Fresh is definitely best – you’ll never want to go back to buying croissants from the grocery store.
I got the courage to make these croissants after attending a cooking class at Sur La Table – I love that place. My lovely in-laws gave me a gift card for a class for Christmas, and when I saw the croissant class it called my name. I’m so glad I went. Croissants seemed like a daunting food to make, but I was pleasantly surprised! They took a long time to make, but the actual making was not too difficult. It’s not a food for a beginner cook, but if you’ve made a loaf of bread – you can make croissants. I’ll share some of the tips I learned at my class too, which will hopefully help you too.
The recipe that I am giving you makes about 28 small croissants. I did not want to make this many, so I cut my dough in half and have frozen the rest for another day. It will be good for a month but I know it’s not going to last that long.
This recipe is adapted from the Sur La Table recipe. You can find it at the bottom of the page. However, as this is new for me – and perhaps for you too – I’m going to step through making croissants with some pictures.
You can make the dough first or the butter block first. It all depends on your schedule. I made my butter block about one week before I started the dough. Life got busy, but it didn’t matter – that’s the beauty of making croissants. However, I’m going to start with the dough here!
Preparing the Dough Block
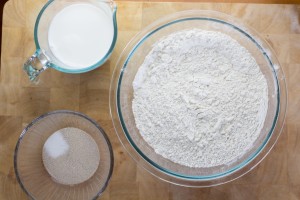
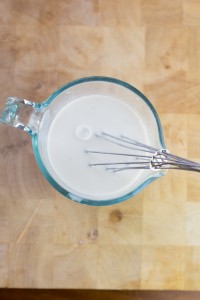
First I prepared all my ingredients. I have warm milk in a cup, flour with salt in a large bowl and yeast and sugar in a small bowl. The yeast and sugar is then added to the warm milk and whisked until it has dissolved.
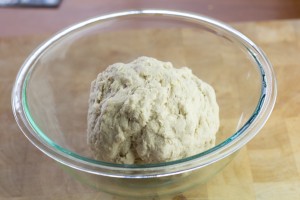
Oil a large bowl. Your completed dough is going to be placed in this for rising. The milk and yeast is added to the flour. Roughly mix the dough in a stand mixer for about 30 seconds. The goal is to incorporate all of the flour. If all of the flour is mixed in you are done. If not, mix for another 10 seconds. If there is still flour present, your dough may be a little too dry. Add 1 teaspoon of water and mix again. The dough should be a very rough mass. Fold the dough in your hands 3-5 times to form a rough circle. Don’t over do this, otherwise your dough will be too hard later. Place the dough in the bowl and cover with plastic wrap. Refrigerate for 30 – 60 minutes to allow to rise.
You have now made the dough ball. That wasn’t too hard, was it? Next is the butter block. It’s really easy, so never fear.
Preparing the Butter Block
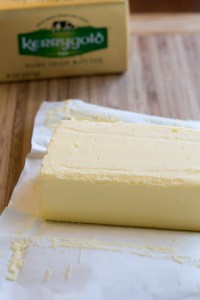
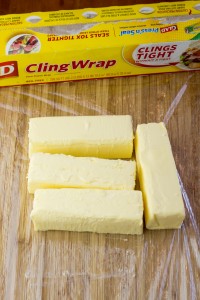
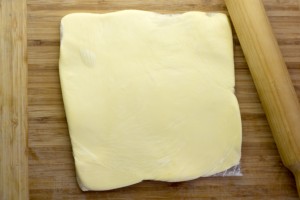
Making the butter block is super easy. Start off with some good quality butter – European butter is the best choice as it has a higher butter fat content. American butter is going to work but your croissants are not going to be as flaky because that butter fat helps with the layers. I used Kerrygold Pure Irish Butter. Take your sticks and cut them however you want (or don’t cut them if you want!). Lay the butter on a large piece of cling wrap. Place the butter in a rough square shape. Wrap the cling wrap loosely around the butter, in a large square measuring about 10 x 10 inches. Make sure all edges are sealed, otherwise you’re going to get a butter leak. Use a wooden rolling pin and beat the butter to soften it, then roll the pin over the butter until the cling wrap is filled with butter. The square doesn’t have to be perfect – and it’s OK to have air bubbles in the cling wrap.
You are now done with the butter block! The butter needs to be cold when you are making croissants, so put it back in the fridge for at least 10 minutes.
Putting the Dough Block Together
You now have a large ball of dough and your butter block. It’s time to put them together to make the Dough Block.
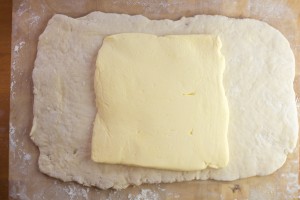
Dust your work surface with flour. Set the ball of dough in the center of the work surface. Roll the dough into a 15 x 12 inch rectangle (mine was a little smaller because my board was a little smaller – it still is going to work so don’t worry if you have the same problem). If you want the most perfect croissants ever – try to pull the dough to form straight edges and sharp corners. As you can see I didn’t worry too much about those sharp corners. Place your butter block in the center of the dough. Fold the dough over the butter block and pinch together the edges. You can also use your rolling pin to roll over the seams to help it stay together. This is your first fold of dough.
If your butter is still cold yet pliable, you can keep on working. You can feel the coolness of the butter through your dough. If it’s too warm and soft, you need to put it back in the fridge for about 30 minutes. (Longer is OK – if you need to go run some errands – any time the dough goes into the refrigerator the dough can stay there for a couple of hours if that works better with your schedule!).
Take your dough out of the fridge, or continue working if your butter was still cold.
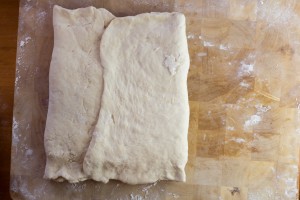
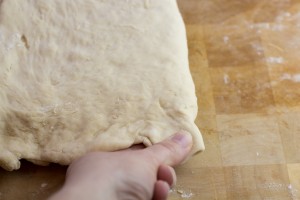
Lightly flour your work surface again and place the seam of the dough facing down. Use your rolling pin to roll the dough out to a rectangle measuring about 20 x 12 inches (once again, mine wasn’t quite that big, but that size is a good aim) If the butter is too hard, you can use your rolling pin to beat the dough (this picture is me beating the dough after a later turn but you can do this at any stage!)
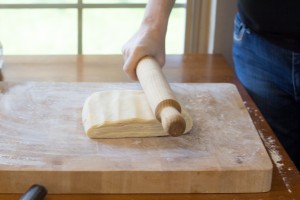
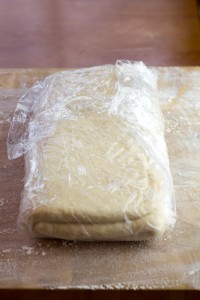
Once you have rolled the dough out into a rectangle, you are going to fold it 3, just like a letter. The dough is then wrapped and placed in the refrigerator for at least 1 hour. This is your second fold.
Next, you’re going to do the same thing again…..roll the dough out into a 20 x 12 rectangle, then fold it again. This will be your third fold. Place it in the refrigerator for another hour.
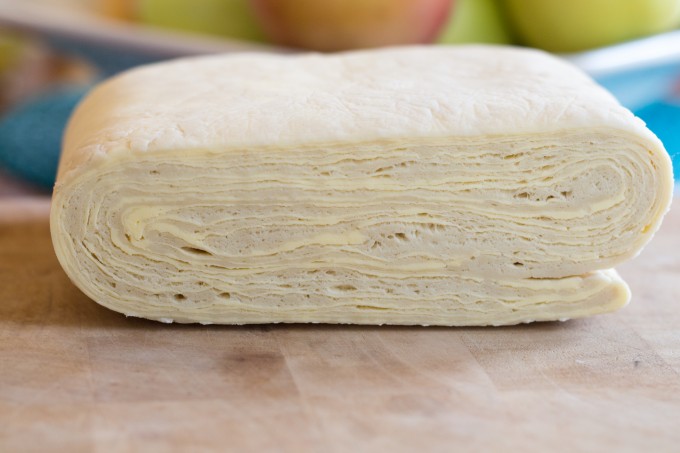
And then it’s repeated … for the 4th fold. Tired of folding yet? Don’t worry – that was your last fold. Make sure it goes into the refrigerator again, for at least 2 hours and up to 24 hours before cutting, shaping and baking the dough. Cut the dough in half. If you want to stop here, the dough can be placed in the freezer for up to one month. ( I have cut the dough in half, because from now on, the recipe uses 1/2 a dough block. Even if you are feeding a crowd and would like to use the whole block, I would recommend cutting it in half, as it will be easier to roll out and shape later.)
Look at those buttery layers! If you need a visual on how many calories are in croissants, here it is!
Shaping Your Croissants
Finally you are ready to shape your croissants! Lightly flour the work surface and roll that dough block out for the final time. Roll the dough out to be roughly 26 x 14 inches (once again – mine was much smaller). It should be about 1/4 inch thick.
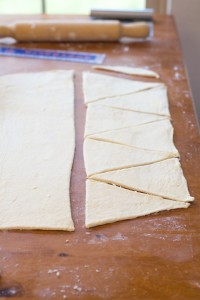
Cut the dough in half lengthwise.
Use a ruler (or your eye if you’ve got good judgement or are not looking for perfection!) and, with a knife, mark every 4 inches along the top edge of your dough. On the bottom edge, mark 2 inches in, then every 4 inches. Using your markings cut the dough into triangles. Take one of your triangles, and gently stretch the dough until it’s a couple of inches longer. The dough kind of looks like the Eiffel Tower. You get to see my stretched one filled with ham & cheese because it’s the only photo the worked out! But plain croissants are stretched the same way.
Line 1-2 baking trays with parchment paper.
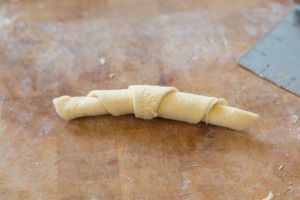
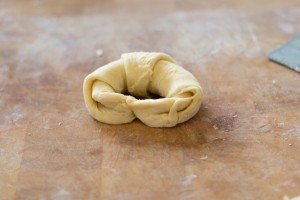
Roll the triangle from the bottom, up toward the tip. The croissant will now look like a log. Curl the dough into a crescent shape, keeping the point of the croissant tucked under so it doesn’t come out during cooking. Place the croissant on the parchment paper. Continue stretching and rolling the dough triangles until have you shaped them all. Place them on the baking tray about 2 inches apart.
If you want to stop here, you can! Place the baking tray with croissants into the freezer, and freeze them until they are firm. Transfer the firm croissants to a plastic freezer bag. They will keep for about 1 month. To bake them, transfer the croissants onto a baking tray lined with parchment paper. Let them defrost and proof at room temperature. Continue with the egg wash (next step) after a couple of hours.
Egg Washing Your Croissants
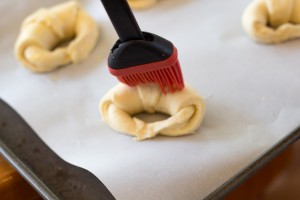
Croissants are always a beautiful golden brown when they are finished baking. To achieve this look you need to give them an egg wash. Lightly beat the eggs and milk in a small bowl. Brush each croissant evenly with the egg wash. Brush from the back to the front – if you go the other way you run the risk of having your croissant coming undone. Keep the left over egg wash – you’re going to need to brush the croissants again later!
Leave the croissants in a spot which is a cool room temperature, for 1-2 hours. The length of time will depend on the temperature of your room. The warmer the room, the less time you will need. The croissants need to nearly double in size. If you feel one, it will be soft. If your room is too hot, the butter will melt. This is not good! If it’s a hot day and you’ve got no cooling, you will be better off letting them rise in the refrigerator for a longer time.
Baking Your Croissants
Yeah! You are almost there. Preheat your oven to 400°F and center your rack. Chill your croissants in the freezer for 10 minutes or 15 minutes in the refrigerator. This firms the butter again – which helps get those flaky layers. Brush the croissants with the egg wash again – you did remember to keep it didn’t you! If not, do what I had to do and make it again.
Bake one baking sheet at a time, rotating it halfway through, for 15-20 minutes. The croissants are ready when they are a deep golden brown. Transfer the croissants to a rack to cool.
Wow! That was long! Making them, and typing all of that up! But making your own croissants is worth the time. And because you can spread each step out, you don’t have to feel tied to your house while you are making them.

- 1 1/2 cups warm whole milk (110 to 115 F)
- 35 g (7 teaspoons) sugar
- 15 g (2 envelopes) active dry yeast
- 625 g (20 oz/4 cups) all-purpose flour
- 20 g (1 tablespoon) salt
- oil for bowl
- 454g (4 sticks) cold, unsalted butter
- 1 large egg
- 1 tablespoons whole milk
- Pour the warm milk into a small bowl. Combine the sugar and yeast in a small bowl. Add the yeast and sugar to the warm milk and whisk the yeast until completely dissolved. Set aside while preparing the flour.
- In a large standing mixer bowl, combine the flour and salt. Add the milk mixture. Using a standard hook, mix the dough for 30 seconds. Check to see if all the dough has been incorporated. If not, mix for another 10 seconds. Add a teaspoon of water to the mixture if the dough is too dry and not incorporating all the flour into the dough ball.
- Grease a large bowl with oil.
- Form the dough into a rough ball and place into greased bowl. Cover with plastic wrap and refrigerate for 30-60 minutes.
- Lay out a large piece of plastic wrap, at least 20 inches long. Lay the butter on plastic wrap in a rough square shape. Wrap the plastic wrap loosely around the butter, in a large square measuring about 10 x 10 inches. Make sure all edges are sealed.
- Use a wooden rolling pin and beat the butter to soften it, then roll the pin over the butter until the cling wrap is filled with butter.
- Place the butter block in the refrigerator for at least 10 minutes.
- Remove the dough ball and butter block from the refrigerator. Lightly flour your work surface.
- Roll out the dough ball until it is approximately 15 x 12 inches. Gently pull or stretch the dough to form straight edges and sharp corners.
- Place the butter block in the center of the dough. Fold each side over the butter and pinch the edges of the dough together, sealing the butter inside the dough. If the butter is no longer cool to touch through the dough, return the dough to the refrigerator for about 30 minutes. Otherwise keep working. This is your first fold.
- Remove the dough from the refrigerator. Lightly flour your work surface again. Roll the dough out into a rectangle about 20 x 12 inches. Fold the dough into thirds. Wrap the dough in plastic wrap and return to the refrigerator for at least 1 hour. This is your second fold.
- Remove the dough from the refrigerator. Lightly flour your work surface again. Roll the dough out into a rectangle about 20 x 12 inches. Fold the dough into thirds. Wrap the dough in plastic wrap and return to the refrigerator for at least 1 hour. This is your third fold.
- Remove the dough from the refrigerator. Lightly flour your work surface again. Roll the dough out into a rectangle about 20 x 12 inches. Fold the dough into thirds. Wrap the dough in plastic wrap and return to the refrigerator for at least 2 hours and up to 24 hours. This is your fourth and final fold.
- Cut the dough block in half. If you are not going to use all of the dough, store the second half in the refrigerator for up to 24 hours or in the freezer for up to one month.
- Remove the dough block from the refrigerator.
- Lightly flour the work surface. Roll the dough out to be roughly 26 x 14 inches (once again - mine was much smaller). It should be about 1/4 inch thick.
- Cut the dough in half lengthwise.
- Use a ruler and, with a knife, mark every 4 inches along the top edge of your dough. On the bottom edge, mark 2 inches in, then every 4 inches. Using your markings, cut the dough into triangles.
- Take one of your triangles, and gently stretch the dough until it's a couple of inches longer. The dough kind of looks like the Eiffel Tower.
- Line 1-2 baking trays with parchment paper.
- Take a dough triangle and roll the triangle from the bottom, up toward the tip. The croissant will now look like a log.
- Curl the dough into a crescent shape, keeping the point of the croissant tucked under so it doesn’t come out during cooking. Place the croissant on the parchment paper. Continue stretching and rolling the dough triangles until have you shaped them all. Place them on the baking tray about 2 inches apart.
- Lightly beat the eggs and milk in a small bowl. Brush each croissant evenly with the egg wash. Place the left over egg wash in the refrigerator. It will be used for a second coating later.
- Leave the croissants in a spot which is a cool room temperature, for 1-2 hours. The length of time will depend on the temperature of your room. The warmer the room, the less time you will need. The croissants need to nearly double in size.
- Preheat your oven to 400°F and center your rack. Chill your croissants in the freezer for 10 minutes or 15 minutes in the refrigerator to firm the butter again.
- Brush the croissants with the egg wash again.
- Place one baking sheet in the oven at a time, rotating it halfway through, for 15-20 minutes. The croissants are ready when they are a deep golden brown. Transfer the croissants to a rack to cool.








Thanks you so much. My grand daughter is turning 13 and all she ever wanted was a Parisian Birthday theme, so here I go. You have made it much easier by having such an explicit recipe for croissants. I will be looking for more goodies as I must come up with a full menu, minus escargo lol.